What a surprise! On pulling back a piece of hardboard outside the kitchen, there was a perfectly formed well foundation, and it had not been filled in. It had completely lost its top over the years and had just been covered up. Needless to say, it needed to be rebuilt. There were no pictures of the original, so we just had fun creating it. I think it fits in very well.
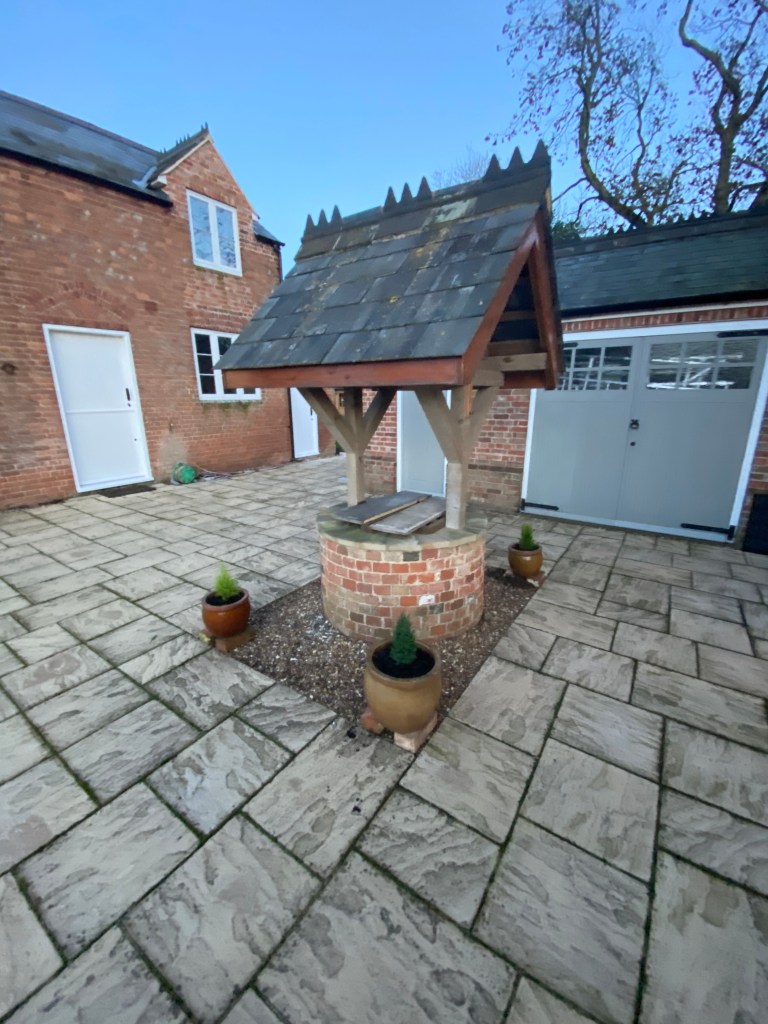
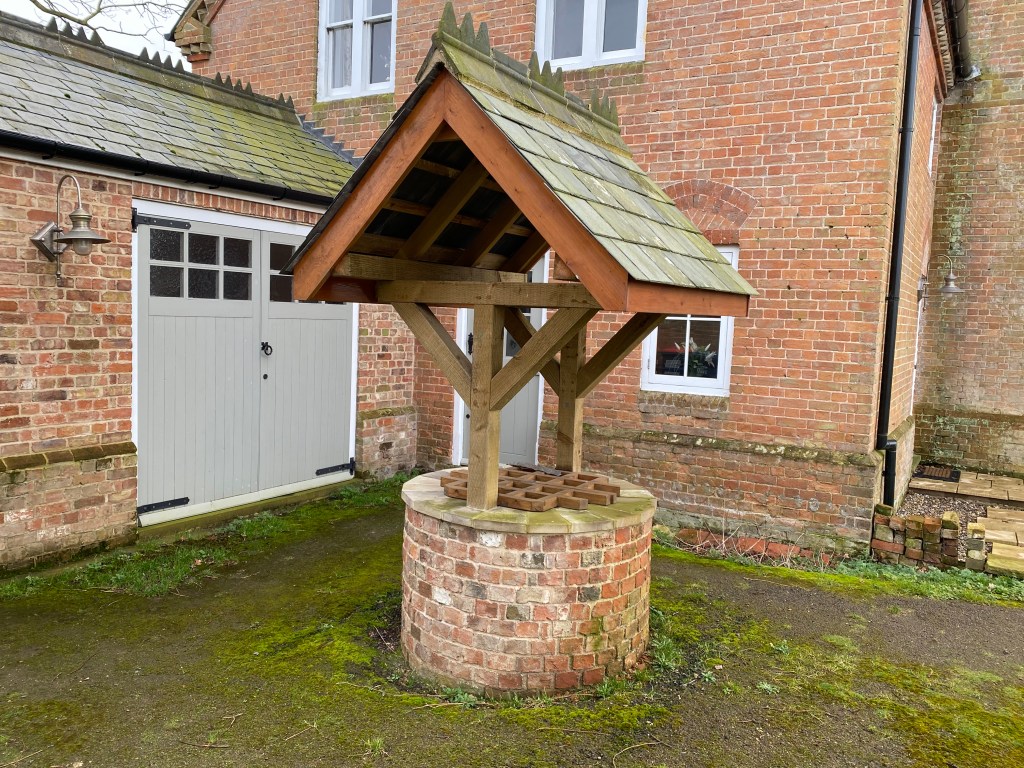
Most of the people we talked to thought it was a crazy idea to rebuild a well. We were very fortunate in our choice of builder who works extensively with lime mortar on restoration and new exactly how to lay the well and make it strong enough to support the roof canopy that the carpenter created.
When I first bought The Old Vicarage, I used to stand and walk across a piece of hardboard that had been I thought just discarded in the middle of the old stable yard. After a few weeks, I was clearing all the rubbish out of the stable yard. Imagine my surprise when I lifted it and found that there was an open well underneath where I had been standing!
The question was either seal it or reinstate it. Of course, I went for the most time consuming option.
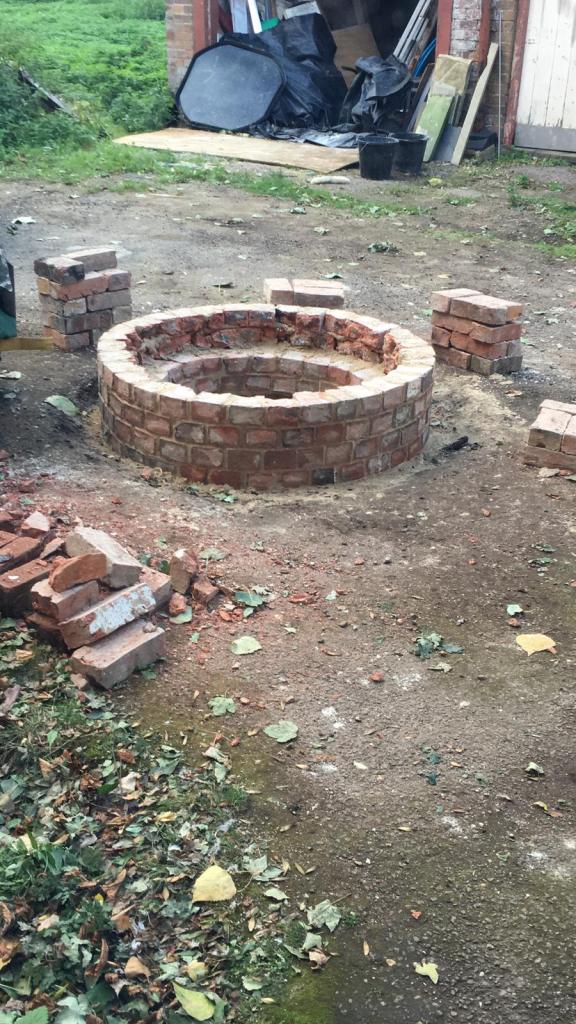
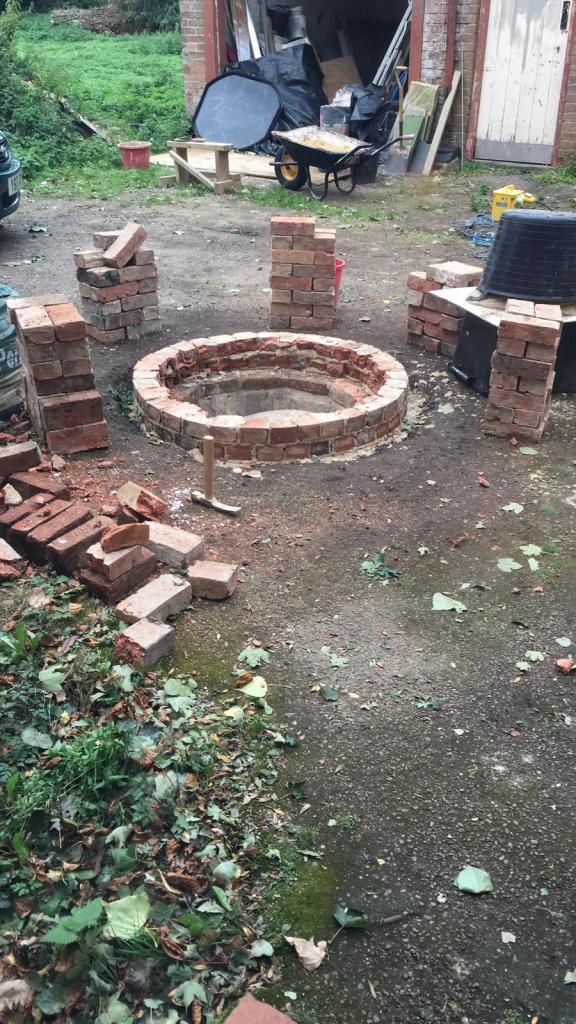
Making a brick structure strong enough to take the well canopy is a work of art.
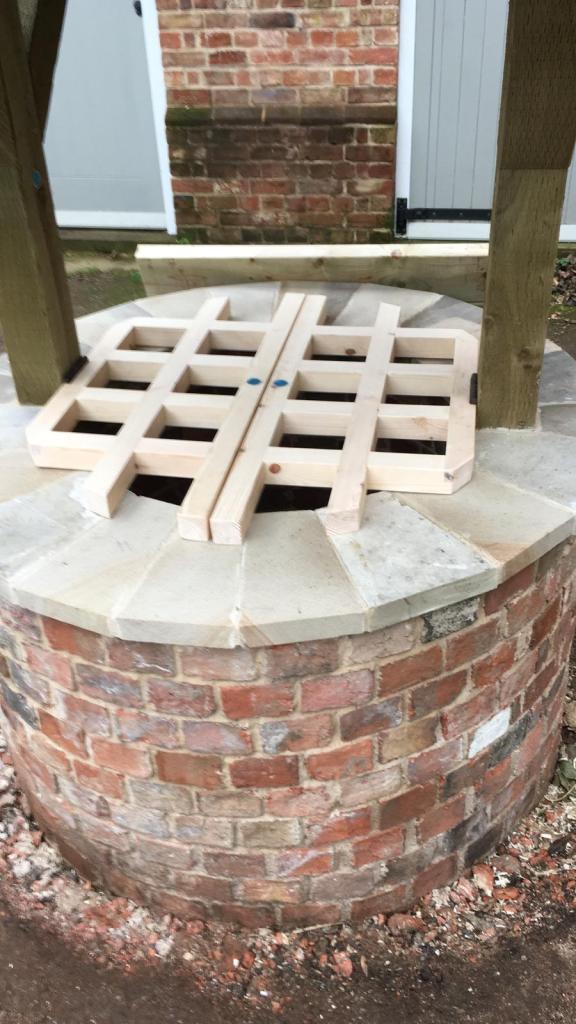
You can see below the bricks the original concrete well foundation. We simply built the new superstructure using the old foundation.
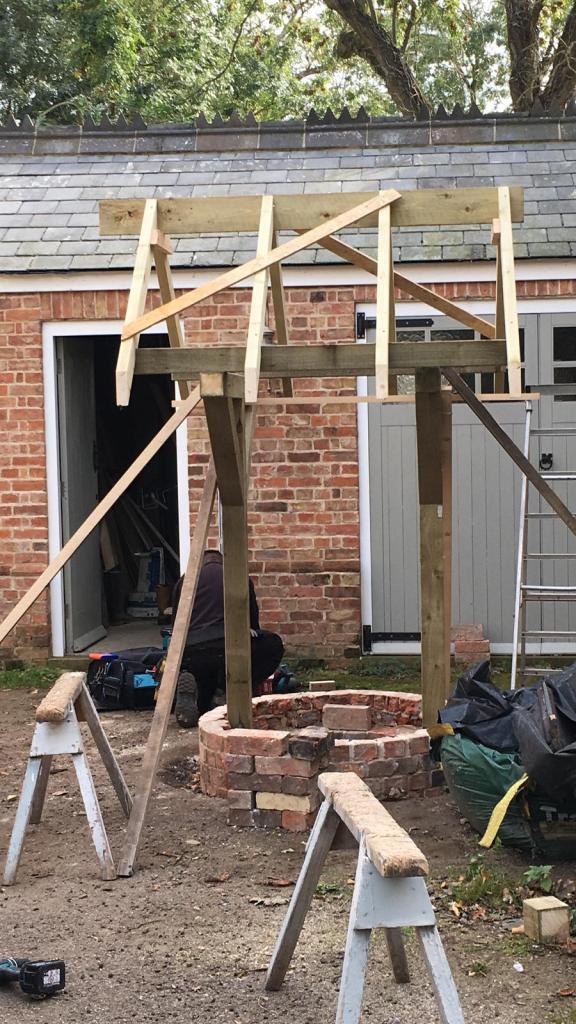
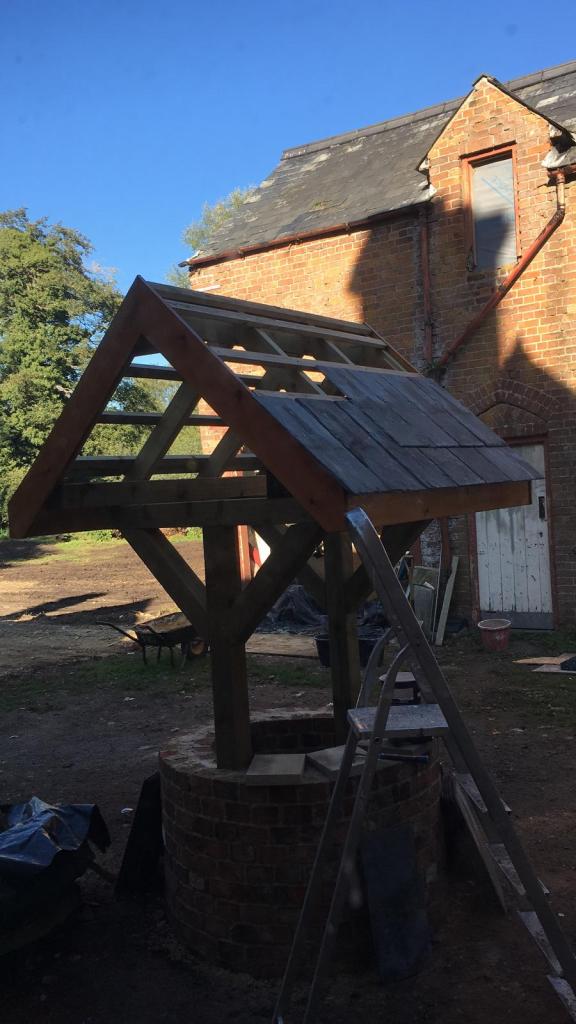
Building the canopy as the walls are being built.
All of the bricks are reclaims from the house.
Using the reclaimed slates. and starting to cut old pieces of sandstone to make the top.
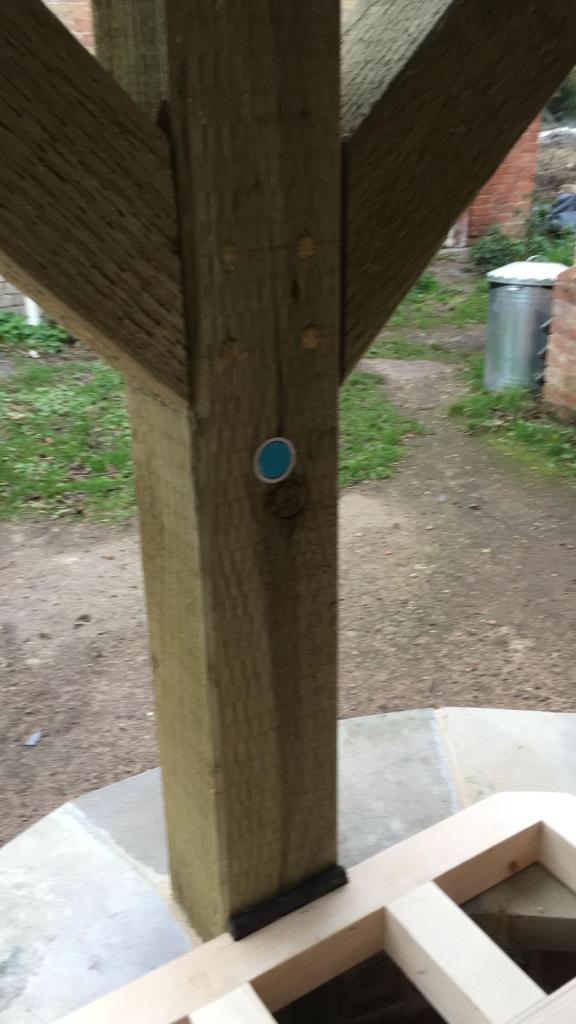
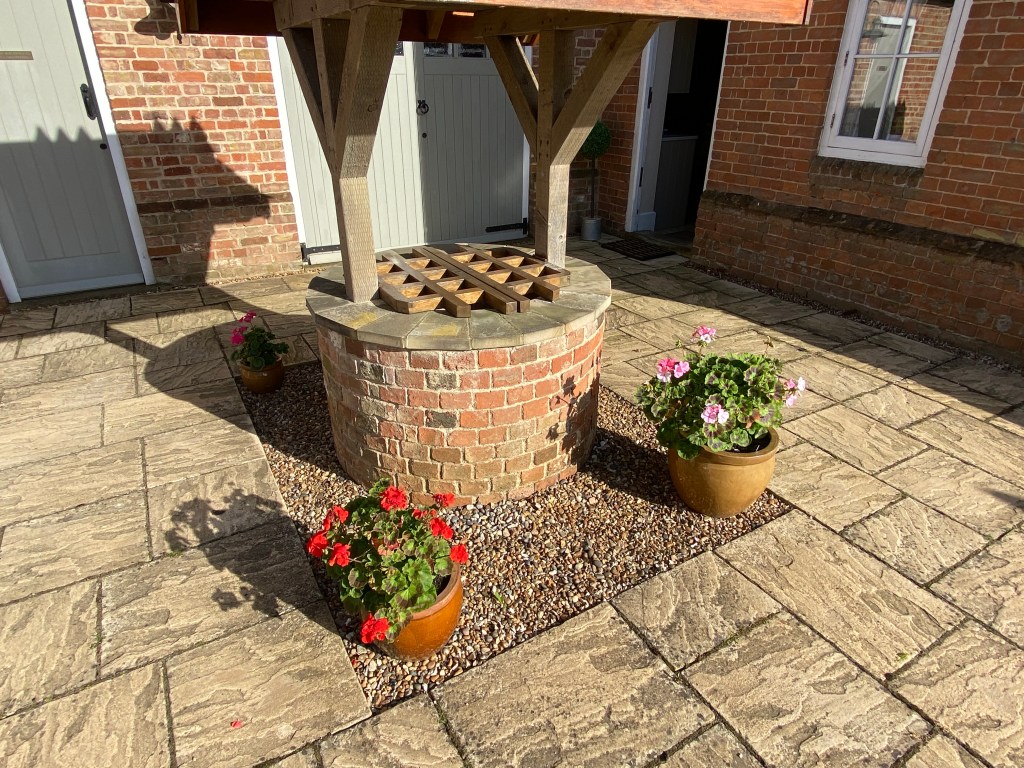
Magnets to hold the well cover when it is raised.
The well cover uses three and a half inch cast iron butt hinges.
Starting to install the ridge tiles. As these were reclaimed from the roof, the insert were already cemented in, which meant that ones that could be cut whole to give a reasonable finish were used. You would normally put your ridge tiles up then add the desired insert.
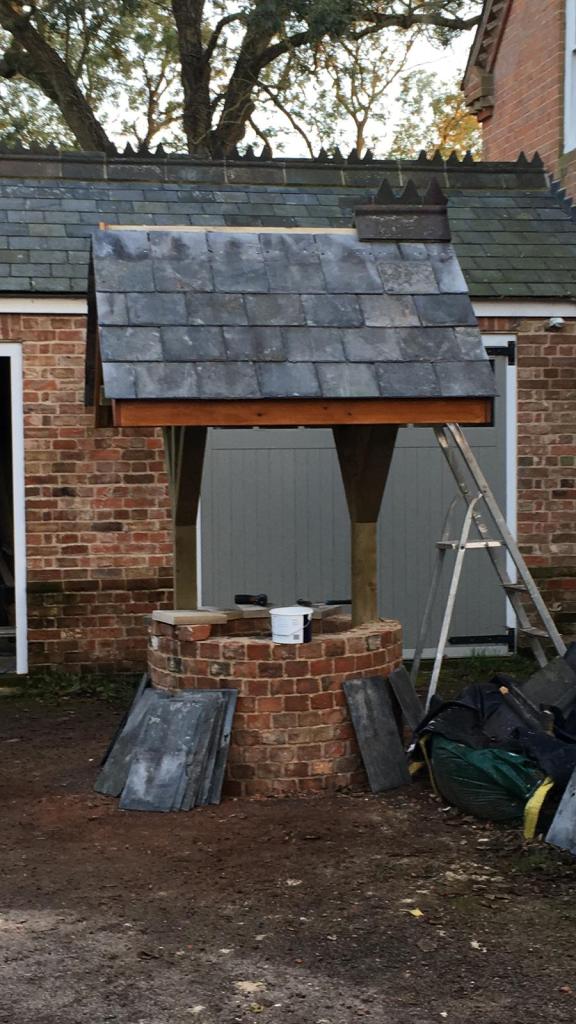

On the top of the well our builder suggested making use of some of the old sandstone we had available. I thing he did a great job of cutting it to size. It really tops the well off.
In addition, the carpenter made a wooden guard for the top it is hinged with a pair of cast iron 4″ hinges. When raised, the guard secures onto strong magnets which are countersunk into the posts and wooden guard.
The well finished, now time to lift the old tarmac.
The roof matches that of the outbuildings and the rest of the house. The only rule we have is that as we replace the main roofs of the house with new slate, all old slate is saved to be used on the lower roofs.
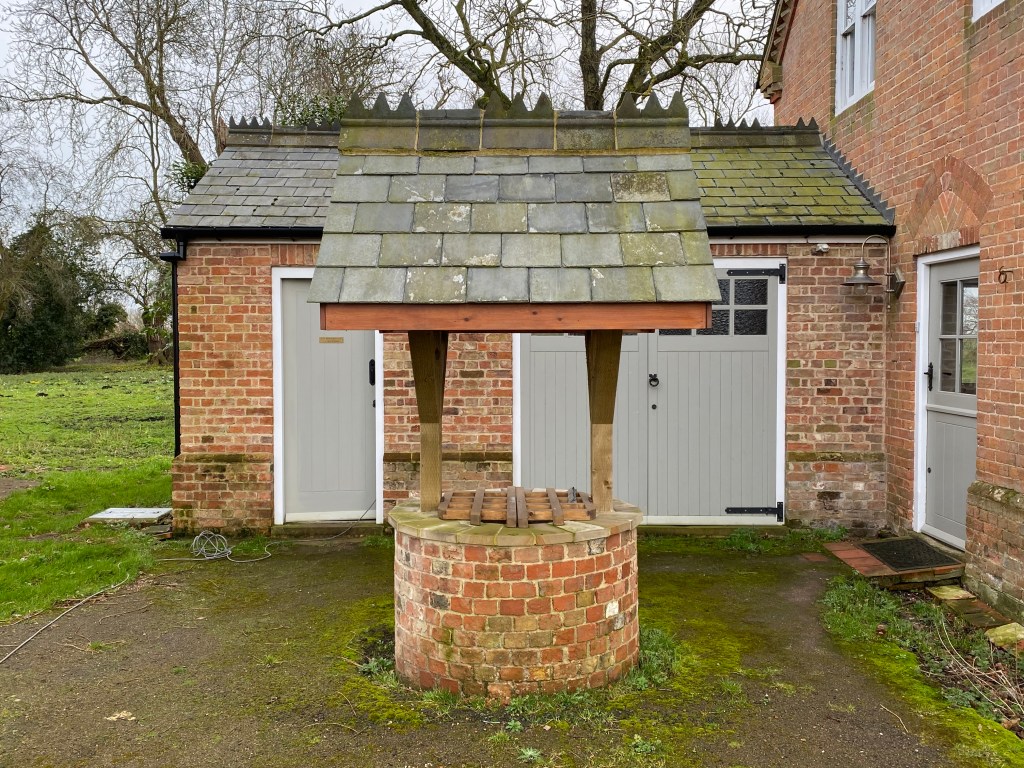

We used the original bricks from the house and also the roof slates and ridge tiles with dog-tooth insert were saved from the re-roofing of the butterfly roof on the main house and reused here.
Renovation
Most of the people we talked to thought it was a crazy idea to rebuild a well. We were very fortunate in our choice of builder who works extensively with lime mortar on restoration and new exactly how to lay the well and make it strong enough to support the roof structure that the carpenter created.
